


Our drives through the county have us more and more excited for Fall; seeing endless amounts of pumpkins, roadside stands full of sweet potatoes and squash and trees full of crunchy apples waiting to be picked. This cooler weather has us craving all the seasonal goodies Fall has to offer, and if your family is anything like ours we are always up for a yummy snack any time of the day. Finding snacks that are easy to make, taste yummy and satisfy the taste buds of the whole family can sometimes be easier said than done. Thank goodness this time of year provides us with a plethora of delicious locally grown produce that offers us endless possibilities.
Taking advantage of in-season produce is always something I love to do. Not only are you guaranteed to get fresh, flavourful fruits and veggies, but they’re easily available and usually more affordable. Make a quick stop at your local fruit and veggie stand or come to Anna’s and check out their produce table that is always stocked full of all the tastiest local produce. Anna’s also carries a great selection of condiments and seasonings from sweet to savoury that is sure to take your snacks and meals to the next level.
Here are three of our current go-to snacks that are made from some of Fall’s star produce; pumpkin, apple and sweet potato.
Apples are one of our favourite snacks, they’re great cut up into slices at home or they can easily be tossed into your bag or purse to munch on while you’re on-the-go. Apples are full of dietary fibre and antioxidants, which helps reduce cholesterol and lower your blood pressure. Not only are they beneficial for your health, but they’re delicious, and there’s nothing more satisfying than biting into a crisp, juicy apple. There are so many great varieties of apples, but Honeycrisp is definitely one of our favourites and it is currently in season so I’ll be keeping our fridge stocked, especially while local supplies last.

This snack is quick, requires no cooking (which is always a bonus), and is perfect when you’re looking for something sweet. Simply cut up a Honeycrisp apple, spoon out a small bowl of Butter Tart Caramel Sauce by Wildly Delicious Preserve Co and start dippin’. The combination of tart apple and sweet caramel is a match made in heaven and a snack your whole family will enjoy! Having cute, snack-size bowls and dishes is a must at our house and I can always count on Anna’s to have just what I need. They may be adorable but they also help with portion control so it’s a win-win for this mom.

Sweet Potato Chips


These salty and sweet chips are great alone with an extra sprinkle of sea salt or dipped in a chipotle sauce. I’ll definitely be making these again, and might even try seasoning them with the Garlicky Fry Salt too.

Pumpkins can sometimes be underestimated, yes they can transform your front porch into a festive Fall paradise and set a spooky scene for Halloween night, but they can also provide you and your family with so much more. Picking out the perfect pumpkins for carving has always been a time-honoured tradition, and roasting pumpkin seeds instantly brings me back to my childhood. Over the years that part of carving our jack-o-lanterns has sort of gone to the wayside, but with my new goal to start being less wasteful, I wanted to take advantage of all the goodness these pumpkins have to offer. The taste of plain pumpkin seeds can be bland and if they aren’t baked properly they can lack that crunchiness we all desire. I’ve put together a step by step process that will help you achieve the perfect crunchy, healthy snack. In the past I’ve simply added sea salt to the seeds but why not experiment and try some different seasonings? Anna’s carries a great selection of seasoning salts by The Garlic Box, so we thought we’d give the Garlicky Fry Salt a try on our pumpkin seeds, and the results were delicious! This fry salt gave our seeds so much flavour, so that got me thinking, what other simple seasonings could we make at home? I came up with a pizza seasoning to satisfy those of you who love something savoury, and a cinnamon sugar seasoning for those of you who have a sweet tooth like me.
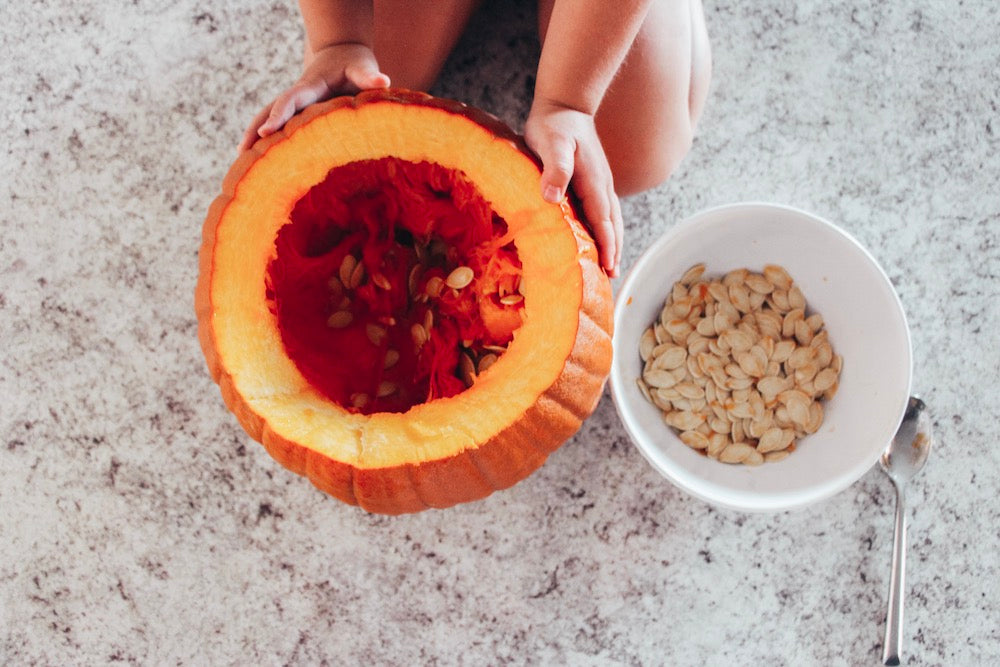
How to roast your pumpkin seeds:
- Preheat oven to 350 degrees F.
- Scoop out all the seeds from your pumpkin using a metal spoon and place in a large bowl.
- You want to clean your seeds really well and discard of any and all pumpkin fibres, so place them in a colander, rinse them and run your fingers through to make sure nothing is hiding.
- Boil your pumpkin seeds for about 10 minutes. This helps to cook the insides of your seeds, so when you roast them, you will get perfect crunchy pumpkin seeds.
- Drain the seeds and place them back into an empty bowl. Toss seeds with olive oil until all the seeds are coated. *If you are making different flavours from one batch of seeds separate them into smaller bowls and use 1 tsp. per bowl*
- If you are using a premade seasoning mixture like the Garlicky Fry Salt, sprinkle until all the seeds are well coated. Use a spoon to stir them around and spread the seasoning salts.
- Put parchment paper down on your baking sheet.
- Place seasoned seeds onto the tray and spread them out as much as you can then place in oven.
- Move and turn the seeds every 10 minutes to ensure even baking and no burning. The seeds should be done after 35-40 minutes or when they become firm and slightly brown on the edges.


PIZZA SEASONING
- 1.5 tbsp grated parmesan cheese
- 1 tbsp Italian seasoning blend (I used Club House brand)

CINNAMON SUGAR SEASONING
- ½ tsp cinnamon
- 1 tbsp brown sugar
- pinch of salt


